Freeduc-USB: live media!
![]()
Live media are small and easy to use thingies, which enable one to use a computer for a defined purpose. For example: boot an office system, or an educational environment, boot a communication appliance, and so on.
Their common feature is that they can boot a computer without accessing its hard disk, so even if the computer has no hard disk or if its hard disk is broken, live media fostered by usb.freeduc.org can boot in less than a minute, and go fast.
Main features of live media
-
lightweight, versatile, efficient, robust; it boots the computer faster than usual;
-
the live medium can be a CDROM, a DVDROM, a USB thumbdrive, a Flash card with SD or mini-SD format, and so on. It is lightweight, a few grams;
-
USB thumbdrive, Flash cards can be very robust. CDROMS and DVDROMS also, if one excepts sensibility to scratches;
-
USB thumbdrive and Flash cards are more flexible: one can customize or updtae them easily;
-
-
A nomadic usage is possible: if one travels between computers, the live medium bears everything which matters;
-
Great scalability: Freeduc-USB is based on free software only, so limitless copying is possible. Copying one medium is a matter of minutes.
What can I do with live media?
There are heaps of possibilities, due to the wide range of packages available in Debian, which is used to produce Freeduc-USB (more than 60,000 packages maintained in year 2019, in the stable distribution).
Here are a few suggestions:
- Artistic media and their dedicated readers
- for example:
- a musical track manager and a collection of sound files
- a video browser and a few movies
- a photo gallery manager and your preferred photographs
- A software collection to teach science
- To be used in the classroom, can be copied for each student, so they can use it at home in the same environment
- A professional-grade typesetting environment
- The LaTeX system, now stable for thirty years, used by many high quality publishers, works very well with live media.
- An interactive kiosk
-
Can be based on Firefox, with a little set of plugins, to create:
- a multimedia kiosk for a museum or for some show
- a browser with restrictions, for example bound to a proxy server
- a school exam environment, by embedding a Wims system on the same medium: this is useful for particular areas, when no Internet access can be provided, like in hospitals, prisons, etc.
- A most handy diagnose and repair tool
- As live media can boot a broken computer, they allow one to fix a hard disk even in extreme cases. The collection of software usable in that context is rich and very handy for technicians.
User Manual: I got a live USB thumbdrive ... what now?
The very first program starting in a computer, even before the operating system, (Windows, Mac OSX, GNU/Linux, or FreeBSD, etc.) is the boot loader from the mother card maker. This program, BIOS or UEFI, works silently, it finds storage devices connected to the main board, and lanches the bootstrap featured by one of those devices.
I choose the USB thumbdrive as the boot medium
To begin with, the computer must be stopped and the USB thumbdrive connected in advance. If the computer is running (for instance, with Windows), stop it, with the USB thumbrive plugged in. Then I must ensure that the live USB thumbrive will boot the computer.
- If the BIOS allows me to choose the boot device
- In many cases, a special key can be pressed during the boot process, to be able to select the boot device. The special key may vary, it can be F8, F9, F12, it may be announced during a few seconds in a screen's corner, or it may be described in the computer's User Manual. When this key is pressed, the boot process is suspended and a selection can be made between a few choices: hard disk, optical disk drive, network, USB drive. The USB thumbdrive can be often recognized by the keyword "USB" and some data, like its brand name.
- Then, just select the USB thumbrive with up and down _arrow keys_, and validate with *Enter*.
- Define the USB thumbdrive as a default boot drive
-
Additionnally to the previous possibility, one can pause the
computer during the boot process to modify the default settings of
the BIOS. Fort his purpose, there is also a special key, which
depends on the computer model: it can be *Del*, *F2* or some other
key, it may be announced in some corner of the screen at the begin
of the boot process. When that key is pressed, a menu system
appears. When browsing this menu system, the following points must
be ensured:
- That USB devices are supported during the boot. If they are ignored, the thumbrive cannot be considered. This option is often in "Advanced Settings"
- Menu items abot "Boot" must be checked. There is unfortunately no general standard usable everywhere. In some cases, it is enough to check and modifiy the choices in a menu named "Device boot order"; in other cases, the USB thumbdrive is considered as a hard disk, and can be found in the list of detected hard disks: in such a case, reorder the boot priorities for hard disks to put the thumbdrive on the top.
- Case of older computers
- Some computers issued before 2005 cannot manage USB drives during the boot. Then, the only remaining possibility is to boot a Linux kernel which will find the USB thumbdrive afterwards. One can burn a live CDROM which provides it, and boot from it, while the thumbdrive is plugged in.
Booting Freeduc-USB
- Selecting the boot options
- A welcome screen is suposed to appear when the USB thumbdrive controls the boot. If one makes nothing, after a few seconds the first option is taken in account for the startup. Before that, on can select an option with the arrow keys (up and down).
- Messages during the boot process
-
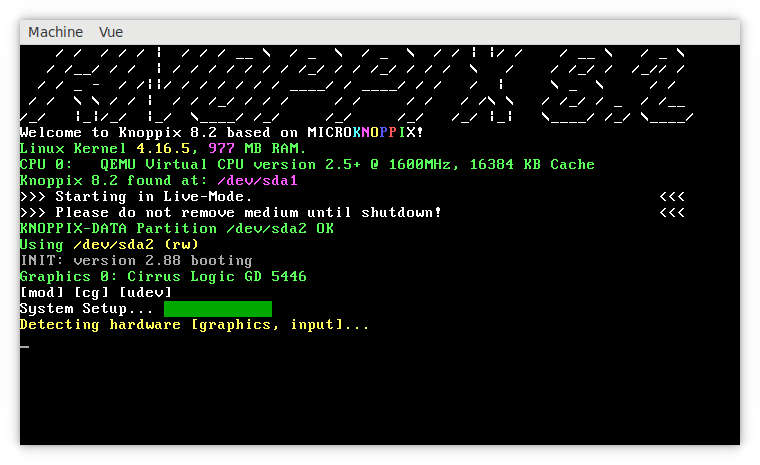
- During the startup, various messages are displaied, along the discovery of the local hardware (Freeduc-USB can run may types of computers, so the hardware discovery is done each time). If the startup stalls (it can happen), please write down the last messages displaied befor the halt: they can be useful to fix the specific issue with that computer.
- Here we are, Freeduc has started!
-
An example of the desktop appearing when Freeduc-USB runs is shown
below. It this cas, the desktop is based on the window manager LXDE.
 Please notice the symbol in the bottom left corner
(),
one must click there to access the applications of the live
medium. One must also click there to shutdown the computer in a
clean fashion. It is important to shutdown the computer with the
right application in order to keep the coherence of the medium.
Please notice the symbol in the bottom left corner
(),
one must click there to access the applications of the live
medium. One must also click there to shutdown the computer in a
clean fashion. It is important to shutdown the computer with the
right application in order to keep the coherence of the medium.
- One must wait until the complete shutdown of the computer before unplugging the live medium.
- Just like you never would open your computer and pull out your hard disk whilie it is running, never unplug the live USB thumbdrive during the working session: it might contain scrambled data afterwards.
-
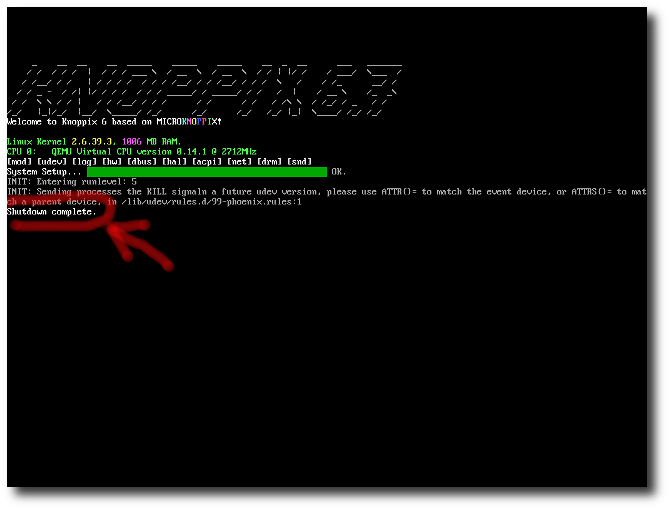
- When one asks for a *clean* shutdown, one must wait until the words "Shutdown complete" appear before unplugging the thumbrive, or until the physic switch down of the computer, which happens a few seconds later.
What the project Freeduc-USB is not:
- Freeduc-USB is not a GnuLinux distribution to install. If you search a distribution with educational packages, please visit the project Debian-Edu, the website Framasoft, ...
- Freeduc-USB is not a family of USB sticks for Windows. In fact it depends not on locally installed software or OS, you can boot a Freedu-USB stick on a diskless computer. If you search sticks with free-libre educational software for Windows, please consider Framakey.
Specific features of Freeduc-USB
Freeduc-USB is a family of fast live USB sticks. Just plug a Freeduc-USB stick in a laptop or desktop computer, and boot.
Half a minute later you get an educational environment based on free software. Freeduc-USB allows a nomadic usage of educational applications. As the software is free, it can be copied limitless.
- Freeduc-USB is fast: the local workstation is ready to use faster with Freeduc-USB than booted ordinarily.
- Freeduc-USB provides freedom: the licenses of the embedded applications and background software allow seamless duplication.
Under the hood of Freeduc-USB
Here is a sketch of the software sources which were are used to build Freeduc-USB
- The boot system is provided by SysLinux.
- The operating system is GNU-Linux.
- The management of the appliance is based on KNOPPIX for older versions. resent versions are based on vanilla Debian setups.
- All of the software packages are managed by dpkg, the Debian packaging system.
- Most of the packages come from Debian official repositories
Structure of a Freeduc-USB stick
The structure explained here if for recent versions, posterior to March 2019.
A Freeduc USB stick comes with two partitions, one which is read-only, the second one which features persistence, and is writable. The second one may not be seen from Windows. Never erase it or let format it unwillingly, even if a Windows system hints you to do so.
- Master boot record: this one is provided by the package syslinux, it allows one to boot from the first partition.
- Partition 1: primary partition; it is recognized like a DVD-ROM
- Hidden partition 2: necessary to boot when UEFI is active
- Partition 3: persistence partition, with an
ext4filesystem. This filesystem will contain all of the customisations, history and the user data.
Published Freeduc-USB versions
Making a new release of Freeduc-USB is now a few hours's task, thanks to the package linux-build.
Here are a few published versions of Freeduc-USB
Freeduc-jbart
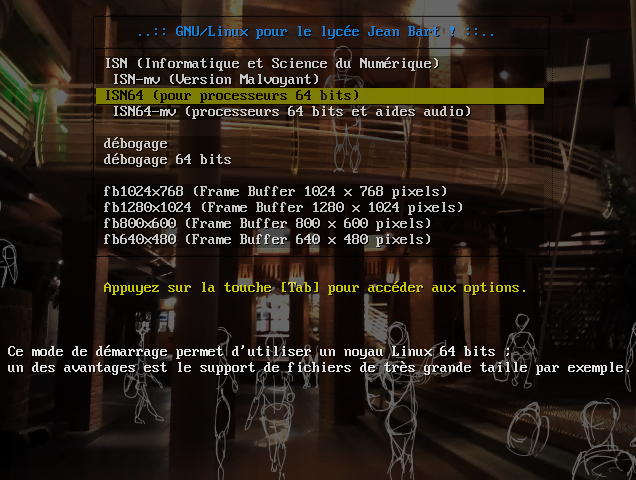
Freeduc-jbart : the name of this pendrive honors the memory of the corsaire Jean Bart, qui au temps de Louis XIV, who saved from starvation the region of East Fladers by putting an end to a blocus organized by the British Navy. This pendrive is developped for lycée Jean Bart of Dunkerque. It is used to teach computer science, robotics, sciences.
Freeduc-Latix
This pendrive feature the TeXlive suite. It allows you to create your bes documents, which you will compose with the best typographic software ever, LaTeX. With Freeduc-LaTix, you can:
- create shot documents, reports, articles;
- create interactive presentation for a beamer;
- write a thesis, abook;
- manage glossaries, bibliography, a well-structured index;
- and so on!
Freeduc-AMC
Freeduc-AMC, version 1.0 (August 2010). Features the package auto-multiple-choice. It allows you to create paper exercises with replies based on multiple-choices, which can be scored automatically with an optical scanner. To deploy the appliance you need locally a computer hooked to a printer and a scanner (or a composite peripheral with both features).
Freeduc-Wims
Freeduc-Wims features a WIMS web server, coming on the pendrive. It provides also a few thousands of training modules, mainly in math, science, language.
The first generation of live USB thumbdrives
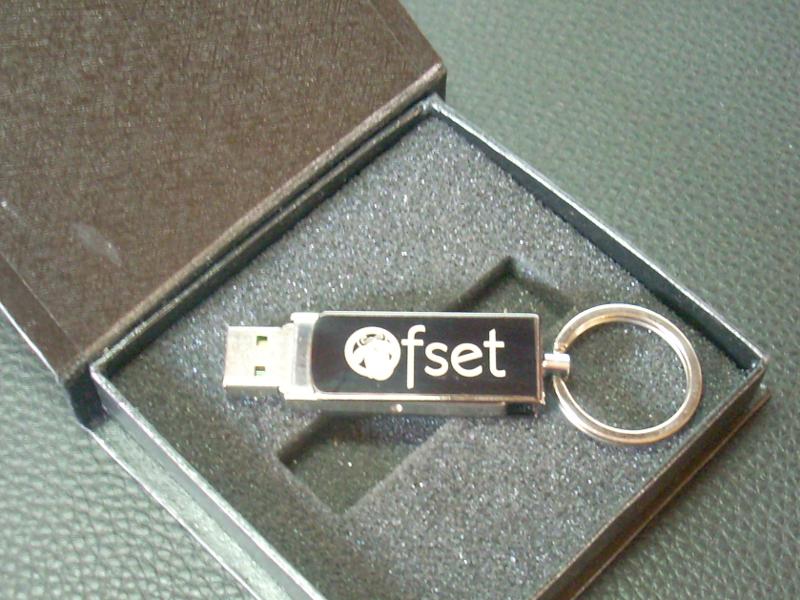
The first Freeduc-USB thumdrive was marked with OFSET's logo. OFSET was a French association, with members from all around the world, which created Freeduc-CD.